من مصنع لفائف الأقمشة غير المنسوجة إليك
هل تساءلت يوماً كيف يمكن أن يؤدي لفة من نسيج غير منسوج من البولي بروبيلين المغزول هل تم صنعه؟
بخلاف الأقمشة المنسوجة التقليدية (التي تتطلب غزل الخيوط، ثم نسجها على النول)، يتم إنتاج الأقمشة غير المنسوجة المغزولة بطريقة عملية واحدة، مستمرة، عالية الكفاءة.
دعونا نستعرض خط الإنتاج خطوة بخطوة.
الخطوة 1: المواد الخام - راتنج البولي بروبيلين
كل شيء يبدأ بـ راتنج البولي بروبيلين (PP) البكر بنسبة 100% — حبيبات صغيرة شفافة تشبه الخرز البلاستيكي الصغير.
تُعد هذه الحبيبات نفس المادة الأساسية المستخدمة في العديد من المنتجات البلاستيكية، ولكن بالنسبة للأقمشة غير المنسوجة، نستخدم نوعًا متخصصًا بمؤشر تدفق ذوبان محدد (MFI) - عادةً 25-40 غ/10 دقائق — مما يضمن تكوين الألياف بشكل صحيح.
يتم خلط الإضافات الاختيارية (مثبتات الأشعة فوق البنفسجية، مثبطات اللهب، الأصباغ) مع الراتنج في هذه المرحلة.
الخطوة الثانية: البثق - إذابة الراتنج
يتم تغذية حبيبات البولي بروبيلين في طارد ساخنداخل جهاز البثق، يقوم برغي دوار بدفع الحبيبات للأمام عبر مناطق ساخنة - عادةً من 220 درجة مئوية إلى 260 درجة مئوية (من 428 درجة فهرنهايت إلى 500 درجة فهرنهايت).
تذوب الحبيبات لتتحول إلى سائل بوليمري سميك يشبه العسل.
الخطوة 3: الترشيح والقياس
يمر البوليمر المنصهر عبر نظام الترشيح لإزالة أي ملوثات أو جزيئات غير منصهرة. ثم، مضخة قياس يتحكم بدقة في معدل التدفق إلى المغزل - مما يضمن وزنًا ثابتًا للنسيج (GSM).
الخطوة الرابعة: الغزل - إنشاء خيوط متصلة
يتم دفع البوليمر المنصهر عبر ريمنيريت — صفيحة معدنية بها مئات أو آلاف من الثقوب الصغيرة (عادة ما يكون قطرها 0.3-0.6 مم).
عندما يخرج البوليمر من المغزل، فإنه يتشكل خيوط سائلة متصلة. على الفور، يتم نفخ هواء عالي السرعة (هواء التبريد) على الخيوط لتبريدها من الحالة السائلة إلى الحالة الصلبة.
هذا هو الجزء "المغزول" من كلمة سبونبوند.
الخطوة 5: الرسم - شد الخيوط
بعد التبريد، تمر الخيوط الصلبة عبر فوهة سحب هواء عالية السرعةيؤدي هذا إلى تمديد الخيوط إلى عدة أضعاف طولها الأصلي، وهو ما:
- يقلل من قطر الخيط (عادةً ما يصل إلى 15-35 ميكرون)
- توجيه جزيئات البوليمر على طول محور الألياف
- يزيد من قوة الشد بشكل كبير
الخطوة السادسة: تكوين الشبكة - وضع الخيوط
ثم يتم وضع الخيوط المسحوبة على سير ناقل متحرك (يُسمى سلك التشكيل). يقوم نظام تفريغ أسفل الحزام بسحب الخيوط لأسفل، مما يُنشئ شبكة متجانسة وعشوائية الترتيب.
هذا التوجيه العشوائي هو ما يمنح الخيوط غير المنسوجة خصائصها قوة موحدة في جميع الاتجاهات — على عكس النسيج المنسوج، الذي يتمزق بسهولة على طول النسيج.
الخطوة 7: الربط - دمج الخيوط معًا
لا تزال الشبكة العشوائية ضعيفة، فالخيوط متداخلة بشكل غير محكم. والآن يجب أن تكون مترابط.
يمر الويب عبر آلة تقويم (بكرات ساخنة) — عادةً بكرتان:
- بكرة منقوشة: يحتوي على نقاط أو أنماط بارزة
- بكرة ناعمة: سطح مستو
الحرارة والضغط (حوالي 150 درجة مئوية - 170 درجة مئوية) تذوب الخيوط جزئيًا عند نقاط التلامس، مما يؤدي إلى دمجها معًا. والنتيجة: أ نسيج قوي ومتماسك.
هذا هو الجزء "الرابط" من كلمة سبونبوند.
الخطوة 8: معالجة السطح (اختياري)
بحسب الاستخدام، قد يتلقى النسيج معالجات الأسطح:
- المعالجة المحبة للماء: يجعل المواد ماصة للماء (للمناديل المبللة، ومنتجات النظافة النسائية، والطبقات الطبية الماصة)
- العلاج المضاد للكهرباء الساكنة: يقلل الشحنة الساكنة
- العلاج المضاد للبكتيريا: للاستخدامات الطبية
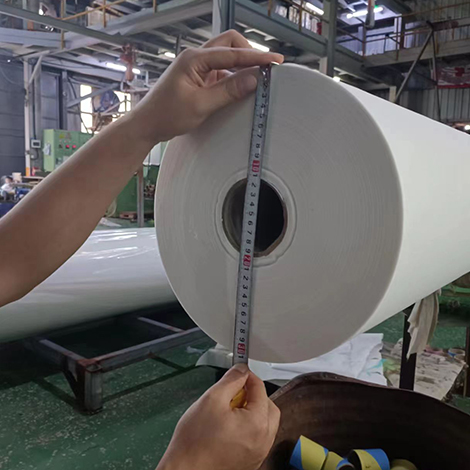
الخطوة 9: اللف - لف القماش النهائي
يمر النسيج النهائي من خلال تشذيب الحواف (لضمان حواف نظيفة ومستقيمة)، ثم يتم لفها على بكرات كرتونية كبيرة - عادةً قطر داخلي 3 بوصات أو 6 بوصات.
تتراوح عروض اللفائف عادةً من من 1.6 متر إلى 3.2 مترتختلف أطوال اللفائف حسب خط الإنتاج، وتختلف حسب وزنها بالجرام لكل متر مربع ومتطلبات العميل.
الخطوة العاشرة: اختبار الجودة والتعبئة والتغليف
قبل الشحن، تخضع كل لفة لـ اختبار الجودة:
- الوزن الأساسي (غرام/متر مربع): تم التحقق من خلال أخذ العينات والماسحات الضوئية الآلية
- قوة الشد: MD (اتجاه الماكينة) و CD (الاتجاه العرضي)
- استطالة: نسبة التمدد قبل الكسر
- عرض: يضمن أبعادًا متسقة
- الفحص البصري: لا ثقوب، ولا تلوث، ولا ترابط غير متساوٍ
يتم تغليف لفائف الورق بغلاف بلاستيكي واقٍ، ووضع ملصقات عليها، وتجهيزها للشحن.
مخطط خط الإنتاج (مفهومي)
| منصة | معدات | الناتج |
|---|
| 1. المواد الخام | قادوس / صومعة الراتنج | حبيبات البولي بروبيلين + إضافات |
| 2. البثق | طارد لولبي أحادي | بوليمر منصهر |
| 3. الدوران | دوار + هواء التبريد | خيوط صلبة متصلة |
| 4. الرسم | فوهة هواء عالية السرعة | خيوط موجهة وممتدة |
| 5. تكوين الشبكة | حزام التشكيل + فراغ | شبكة خيوط عشوائية الترتيب |
| 6. الترابط | بكرات تقويم ساخنة | نسيج غير منسوج مترابط |
| 7. اللف | آلة لف / آلة تقطيع | لفائف جاهزة |
المزايا الرئيسية لعملية الغزل غير المباشر
| ميزة | لماذا يهم ذلك |
|---|
| إنتاج عالي | تصل سرعتها إلى 600 متر/دقيقة - أسرع بكثير من النسيج |
| خيط متصل | لا وبر، لا اهتراء، لا نقاط ضعف ناتجة عن الألياف القصيرة |
| عملية من خطوة واحدة | من الراتنج إلى النسيج في دقائق - طاقة منخفضة، وعمالة منخفضة |
| خصائص موحدة | وزن وقوة متسقان على كامل اللفة |
| قابلة لإعادة التدوير | 100% بولي بروبيلين - يمكن إعادة تدويره إلى منتجات جديدة |
مقارنة بين تقنيات الأقمشة غير المنسوجة بتقنية سبونبوند وغيرها
| عملية | نوع الألياف | القوة النموذجية | التطبيقات الشائعة |
|---|
| سبونبوند | خيط متصل | عالي | المجالات الطبية والزراعية والتعبئة والتغليف والمنسوجات الأرضية |
| ميلتبلون | ألياف دقيقة | قليل | الترشيح، طبقة القناع الوسطى |
| ممشط (ألياف أساسية) | ألياف قصيرة | واسطة | بطانات داخلية، مناديل، عازل حراري |
الخلاصة
عملية الغزل غير المباشر هي أنيقة في بساطتها — صهر، غزل، وضع، ربط، لف. من الراتنج الخام إلى النسيج النهائي في خط واحد متصل.
لا نسج. لا حياكة. لا خياطة. فقط قماش عالي القوة، موحد، واقتصادي يتم إنتاجه على نطاق صناعي.
ولهذا السبب أصبحت الأقمشة غير المنسوجة بتقنية سبونبوند هي المادة المفضلة لمليارات المنتجات التي تستخدم لمرة واحدة والمنتجات المعمرة في جميع أنحاء العالم.
هل تبحث عن مورد موثوق به للفائف الأقمشة غير المنسوجة المصنوعة من البولي بروبيلين؟ نقوم بتصنيع أقمشة سبونبوند أحادية الطبقة بوزن يتراوح من 10 جرامات للمتر المربع إلى 150 جرامًا للمتر المربع، مع توفر عروض وألوان مخصصة.
تواصلوا معنا للحصول على عينات أو عرض سعر - دعونا نناقش احتياجاتكم من الأقمشة غير المنسوجة.